Not all languages are available in the VideoScribe ‘Add text’ feature but it is possible to create text that animates in VideoScribe for any language by following the instructions below.
Please Note: There were some key changes to the way text and fonts worked in v3.6 of VideoScribe. If you are using an earlier version of the software some of the information on this page may not be correct. You can upgrade to the latest version of VideoScribe if you wish to do so.
To see a full list of the languages supported and the fonts that can be used for each language please see the supported languages and fonts article.
If your preferred alphabet isn't currently supported, follow the instructions below to import your text as an SVG image. You can also request for your language to be supported in VideoScribe on the What languages and fonts would you like to see? forum.
Import text as an SVG image file
To import text as an image file using the steps below. There are two ways of creating text as an SVG; an easy way and a bit more complicated way that has better results. There is a very useful thread on our community forum for specific instructions if you are using Adobe Illustrator - Make Any Font, Text or Equation Draw Well (2016).
Method 1 - Quick and easy.
Step 1. Install and open Inkscape (free image-editing software)
Disclaimer: We like this software, and it has performed well during ordinary use, but we have not undertaken any in-depth testing and we have not checked it for the presence of malware or any potentially harmful behaviour, so you download and use it at your own risk and we do not accept any liability for any loss or damage it may cause.
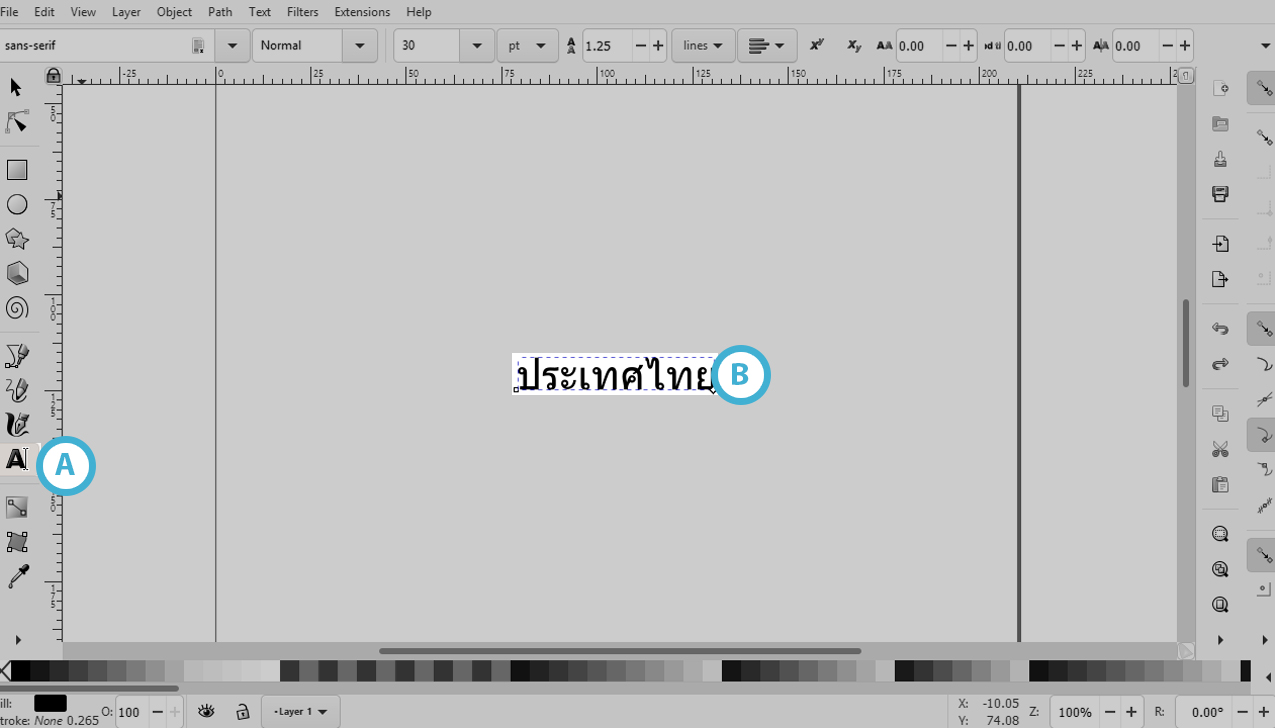
Step 2. Select the type character in the sidebar (A) and write or copy/paste your text into Inkscape (B)
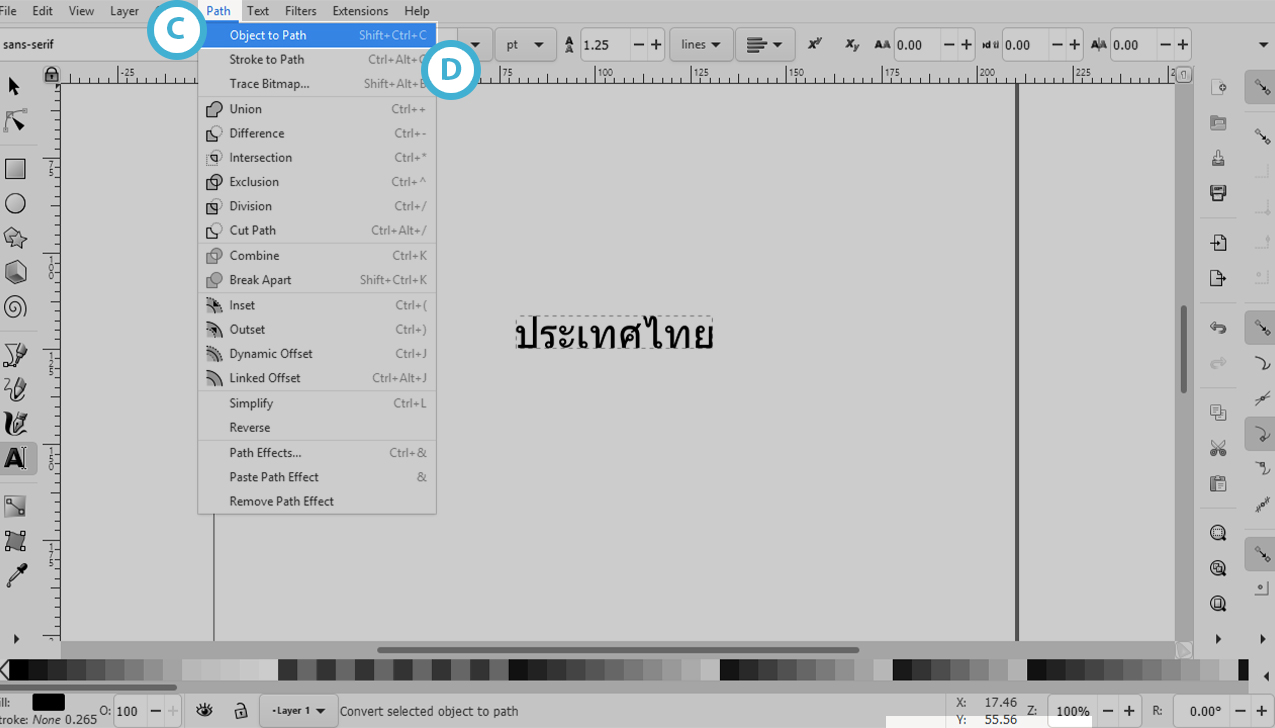
Step 3. Select ‘Path’ (C) from the menu above and then ‘Object to path’ (D) to convert your text into an SVG image
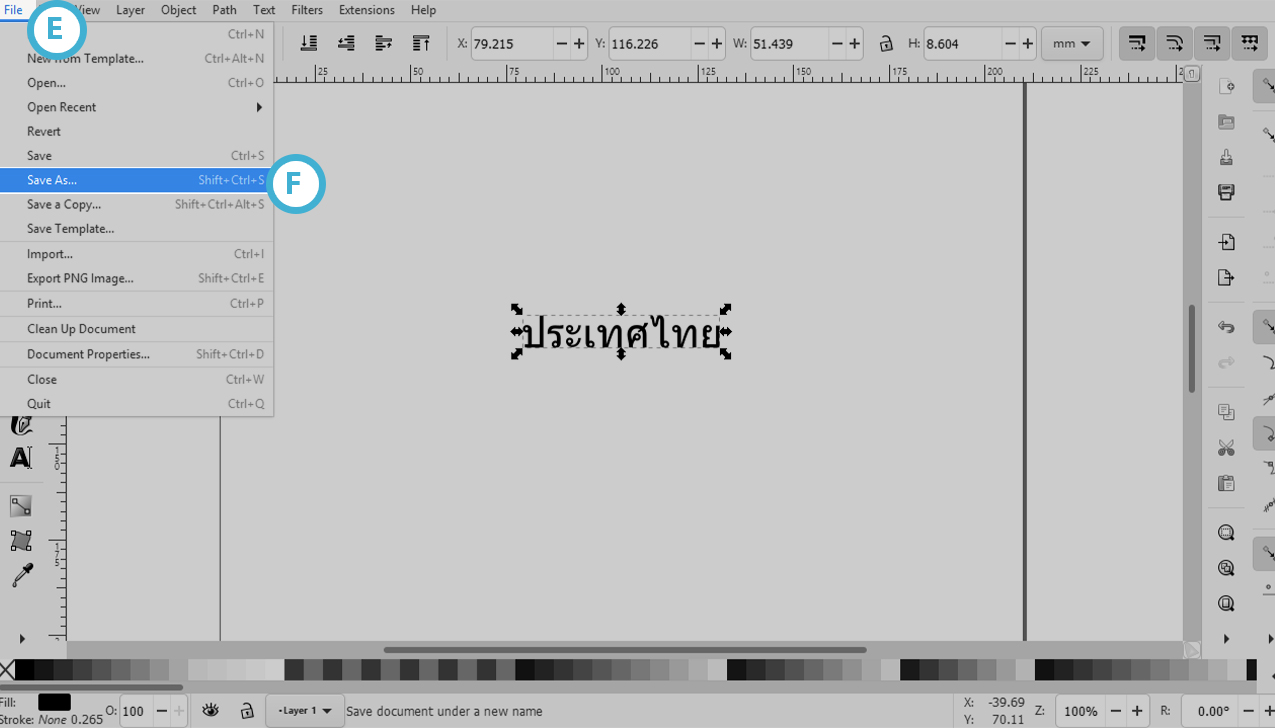
Step 4. Go to ‘File’ (E), ‘Save as’ (F)
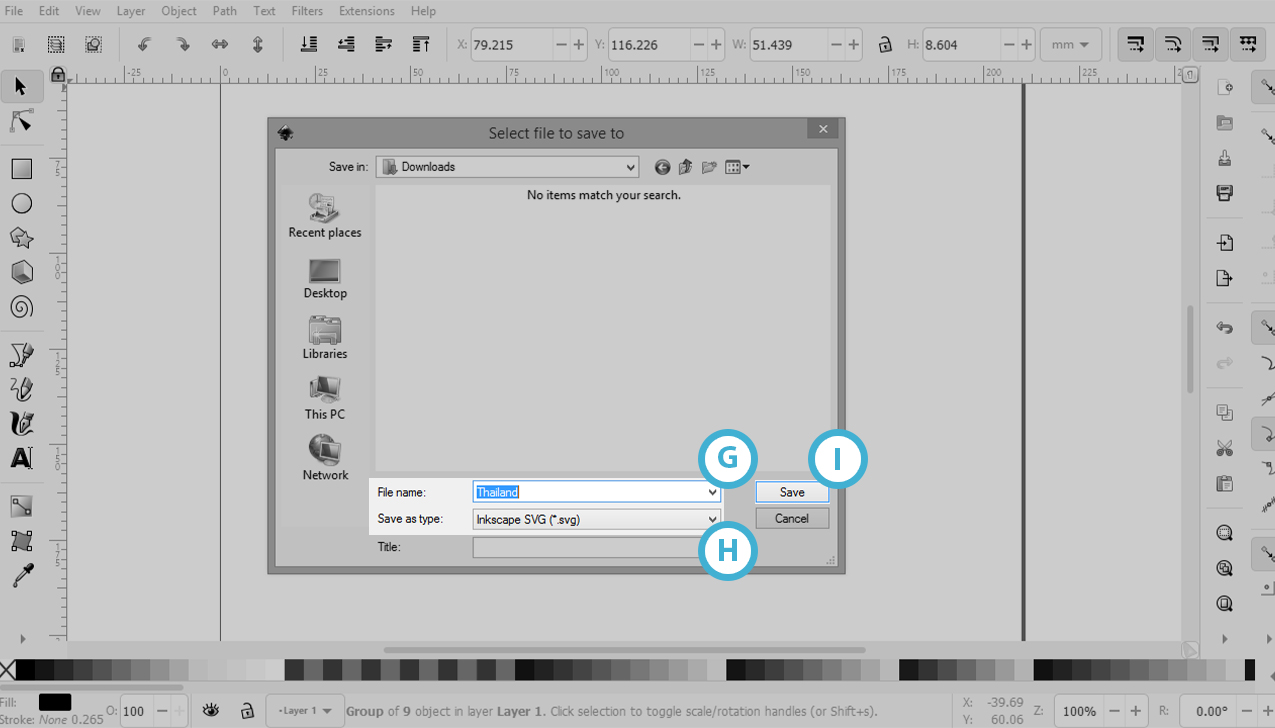
Step 5. Name the file (G), ensure the file type is SVG (H) and Save (I)
Step 6. Import this SVG as an image into VideoScribe
- If you are not sure how to do this please follow the steps on our Import images help page.
- The outline will draw before the image is filled but you will still be able to read the text as it is being drawn and it will become clearer at the end.
Method 2 - Detailed and high-quality results
Here are more detailed instructions for getting text to draw well in VideoScribe by creating a text image using Inkscape, a free SVG editor. The following instructions will take a little more time to complete but the result will be a much more realistic animation in VideoScribe.
Step 1. Install and open Inkscape (free image-editing software)
Disclaimer: We like this software, and it has performed well during ordinary use, but we have not undertaken any in-depth testing and we have not checked it for the presence of malware or any potentially harmful behaviour, so you download and use it at your own risk and we do not accept any liability for any loss or damage it may cause.
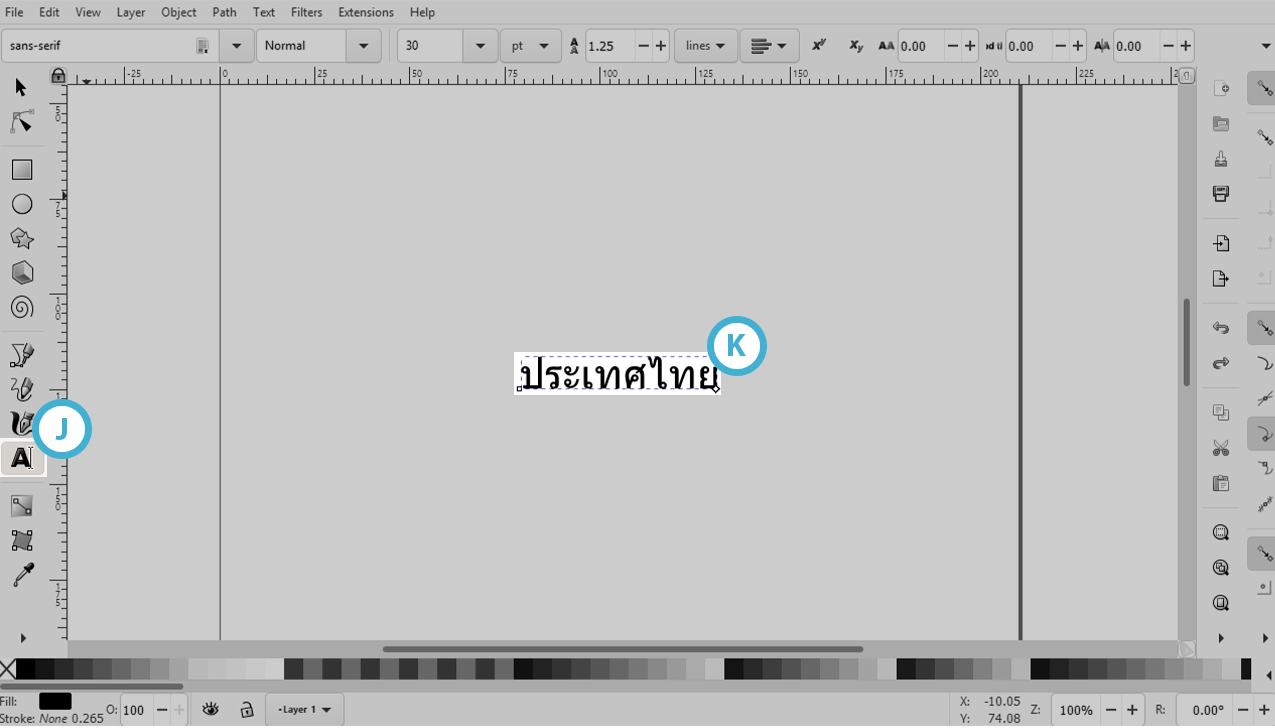
Step 2. Select the type character in the sidebar (J) and type or copy/paste your text into Inkscape (K)
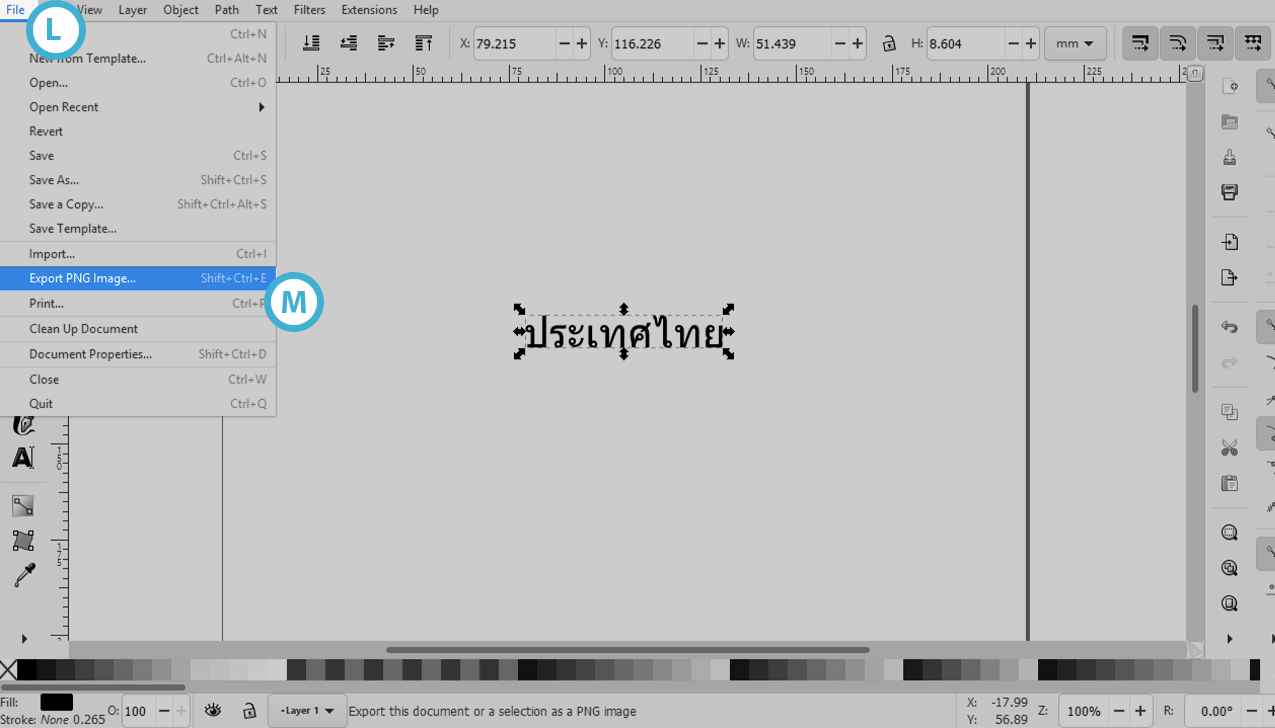
Step 2. Go to ‘File’ (L), ‘Export PNG Image…’ (M)
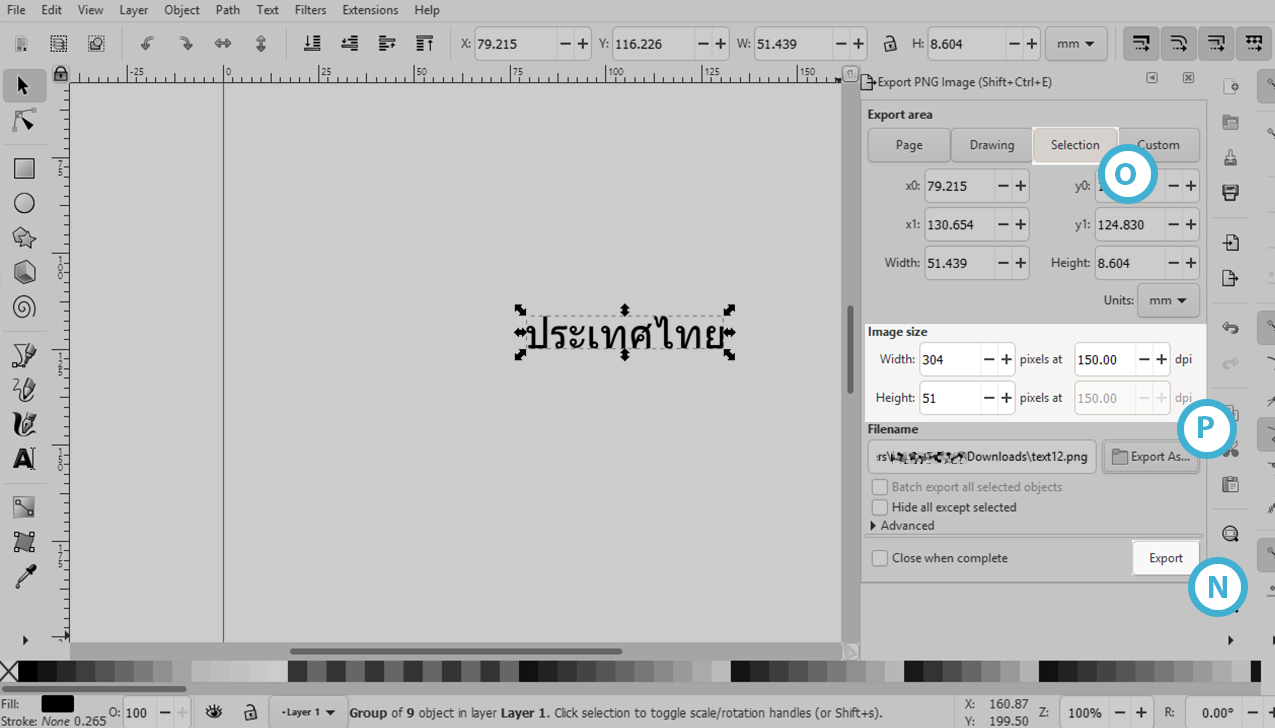
Step 3. Click on ‘Export’ (N)
We use the following settings when exporting:
- Export the selection (O)
- A minimum of 150 dpi (dots per inch) - the higher the DPI the better the image quality (P)
Step 4. Delete the text from Inkscape
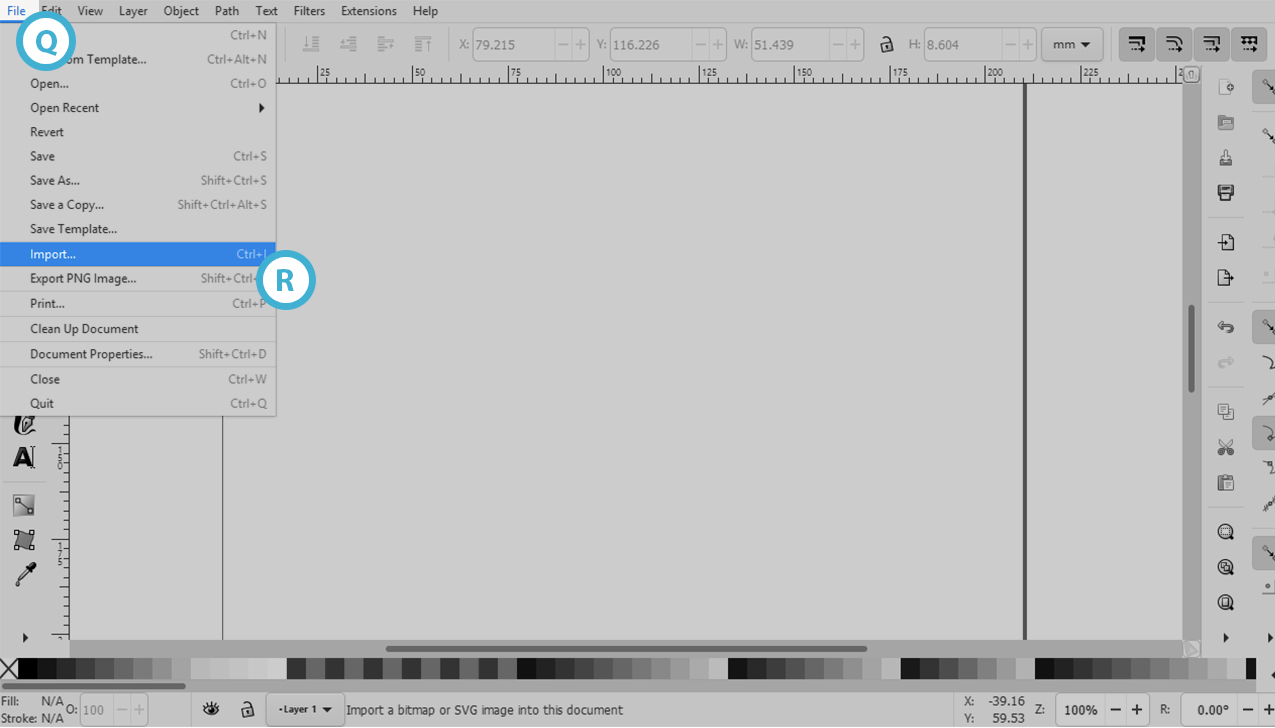
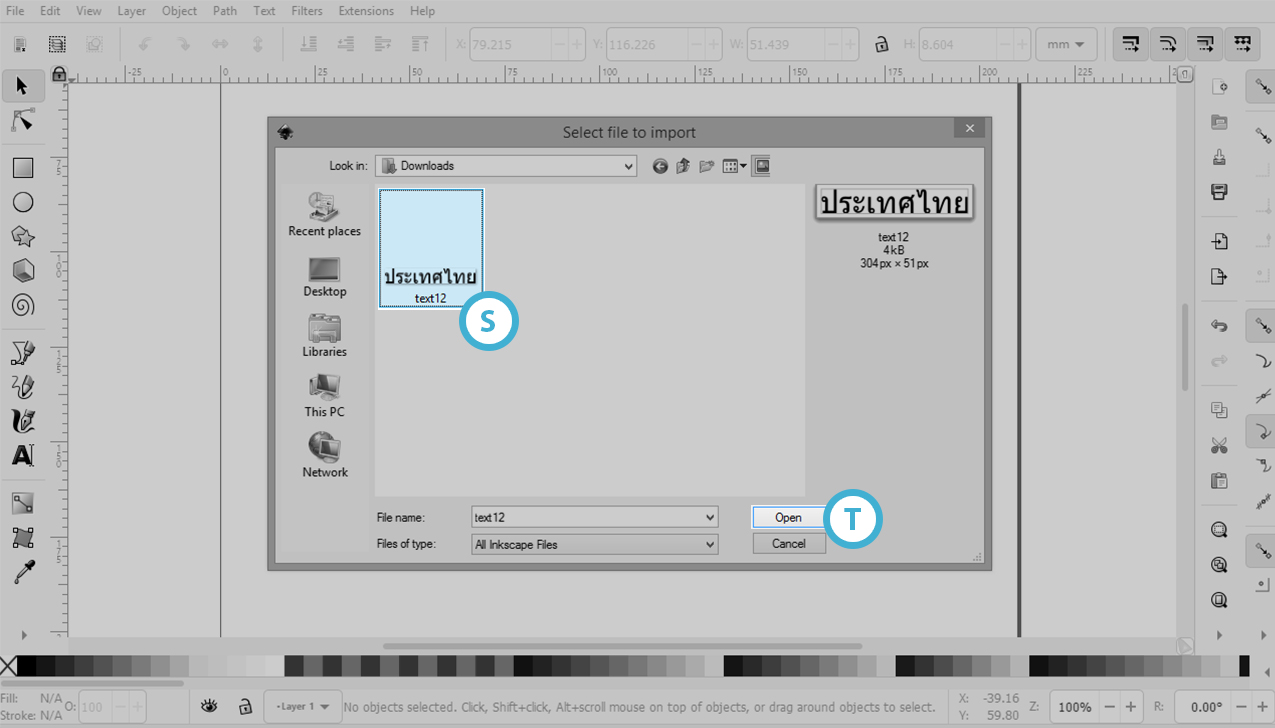
Step 5. Import the Bitmap/JPG image that you just exported
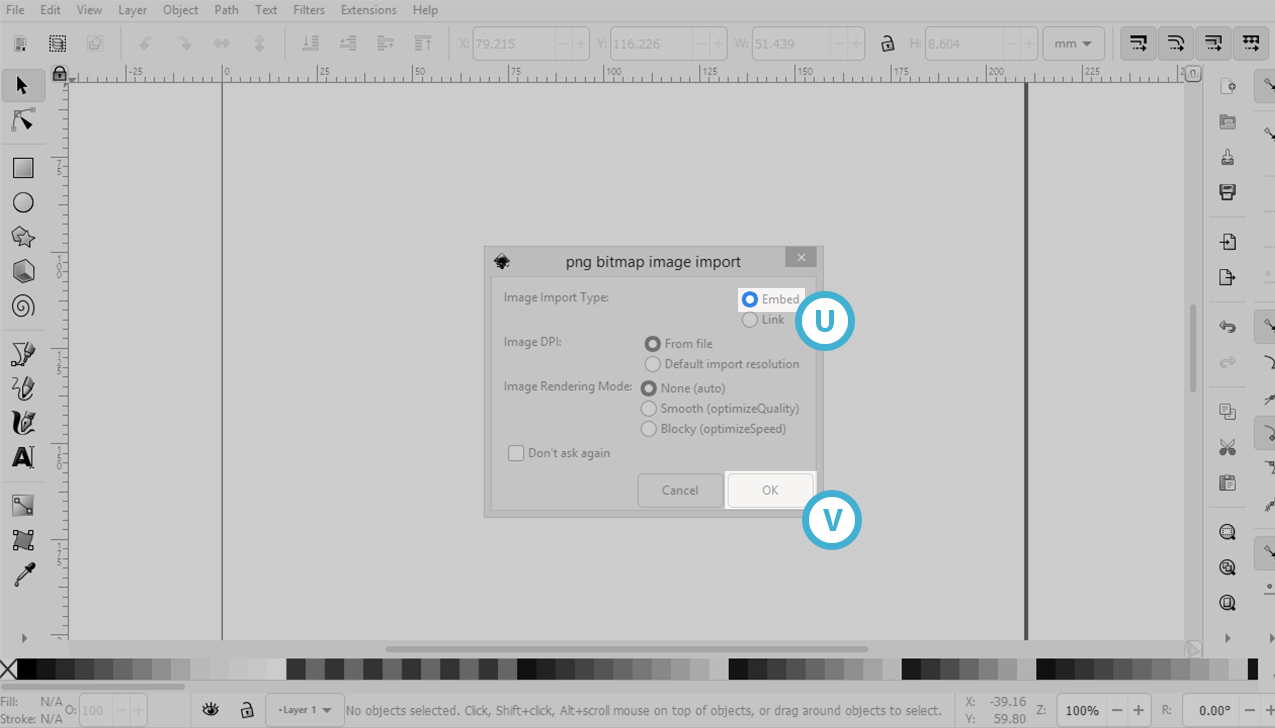
- Go to ‘File’ (Q) then ‘Import..’. (R) and select Embed
- Find the file (S) and click open (T)
- Ensure Embed (U) is selected and click OK (V)
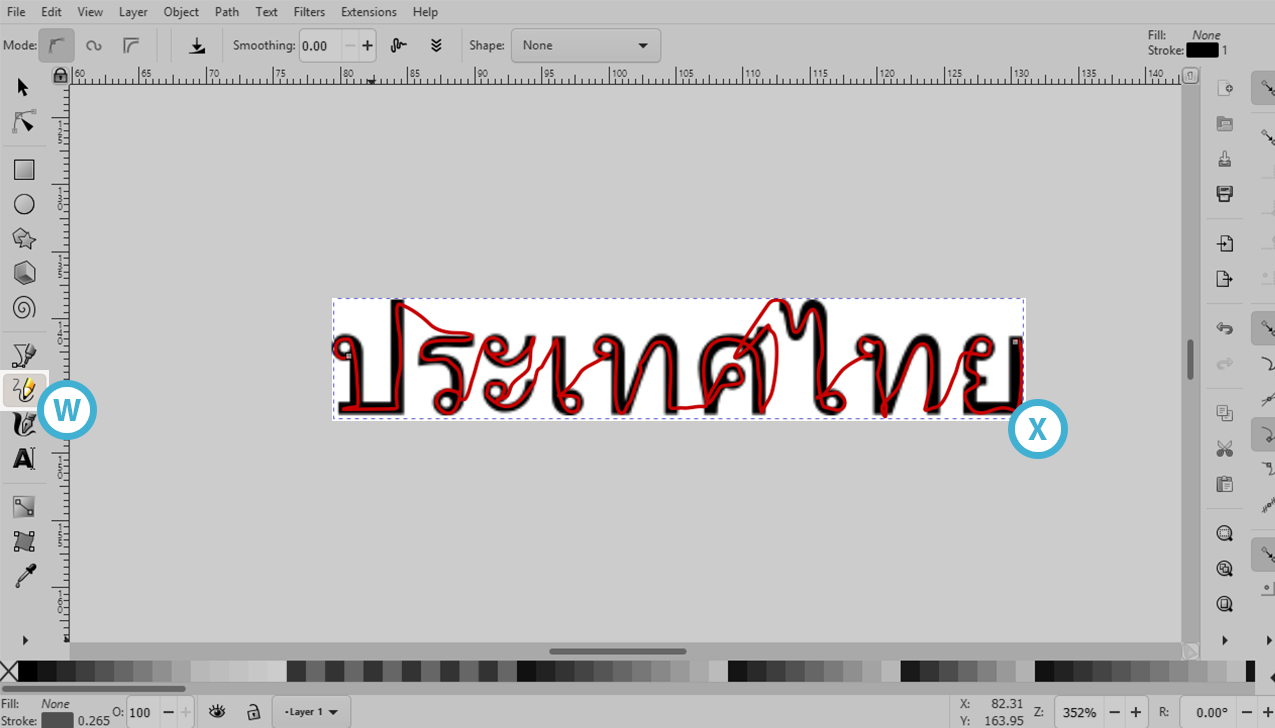
Step 6. When you have the image on the canvas use the Pencil tool (W) to trace over the letters of the text (X) in the same way you would if you were writing it
- These lines are what VideoScribe will follow to draw the text. The more care you take getting this right the better the result will be in VideoScribe.
- In this example, I have used one continuous stroke, you can break it down to a stroke per character if you prefer
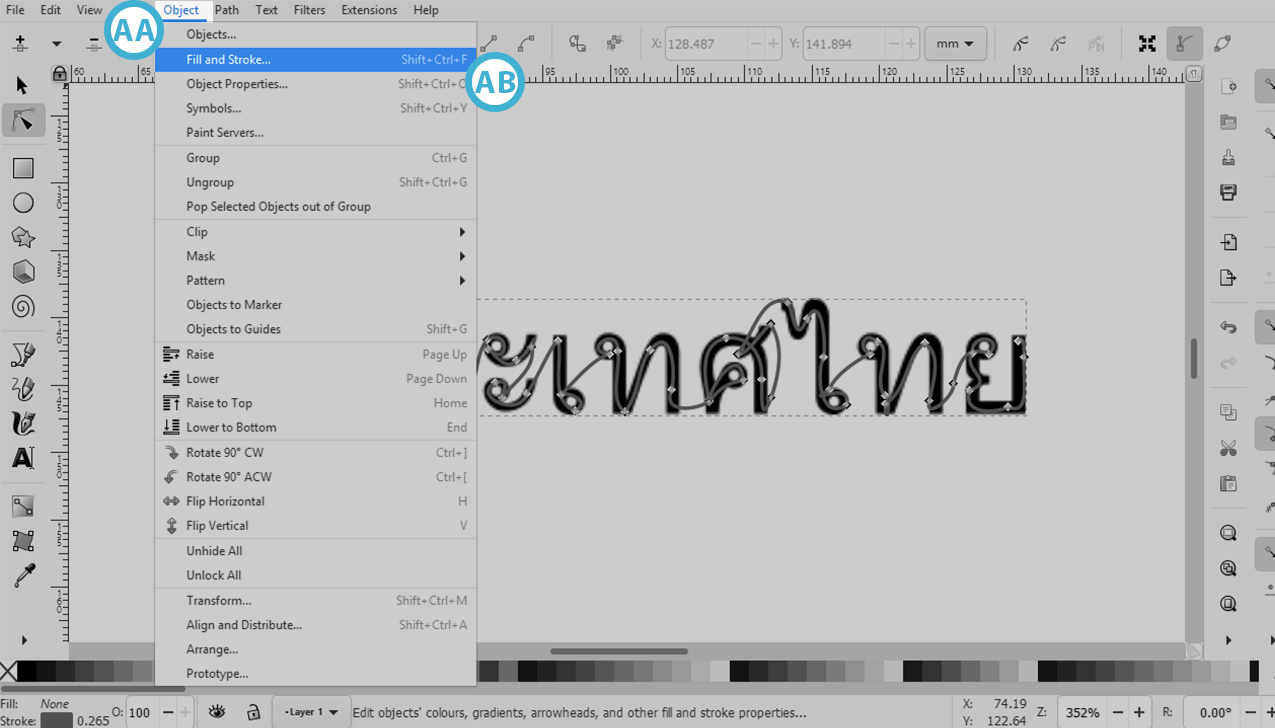
Step 7. Select all the Pencil strokes that you just created and select ‘Path’ (Y), ‘Simplify’ (Z) from the menu

Step 8. With the paths still selected, select ‘Object’ (AA), ‘Fill and Stroke’ (AB) from the menu
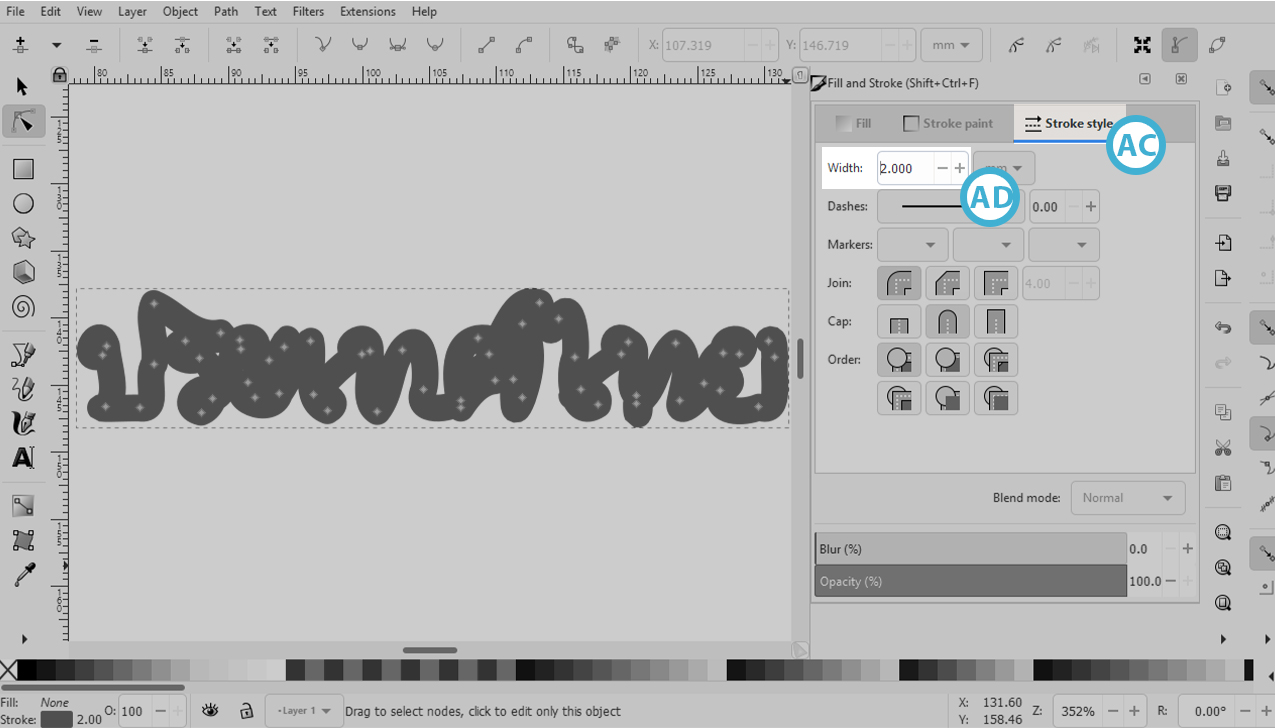
Step 9. From the ‘Stroke style’ tab (AC), Increase the stroke width value (AD) so the text image is covered
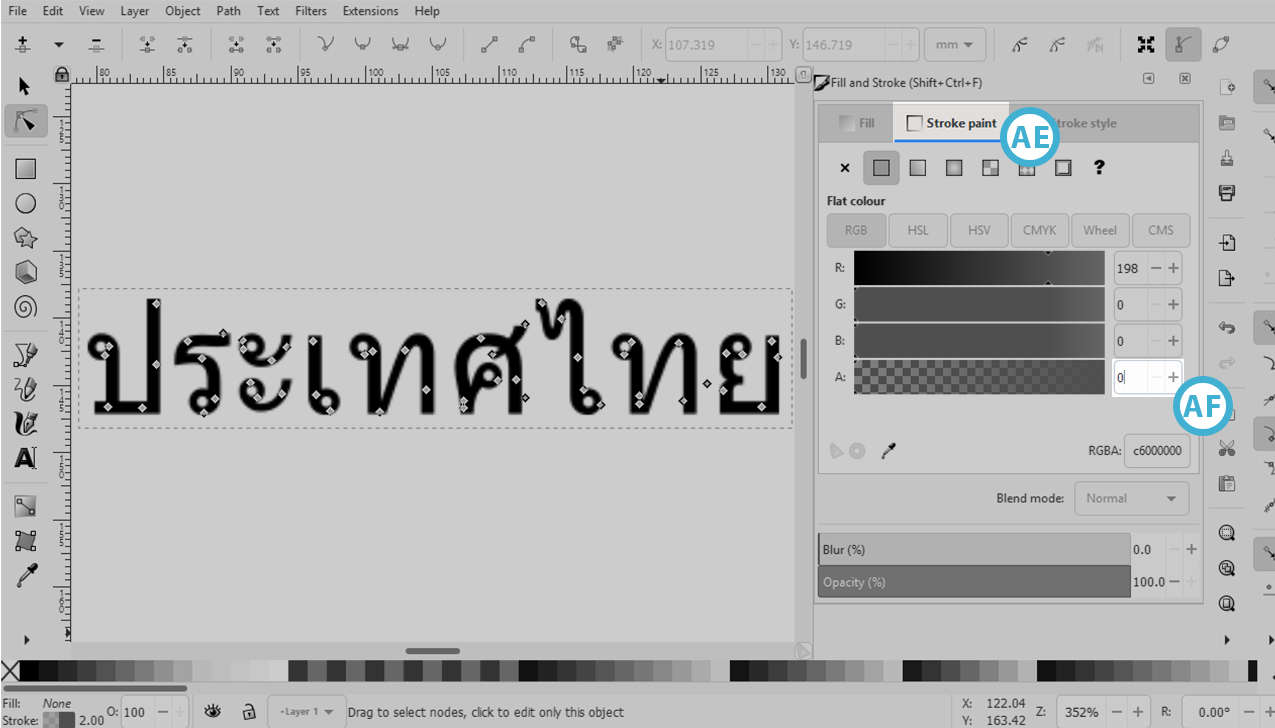
Step 10. From the ‘Stroke paint’ tab (AE) set the Alpha value to zero (AF) so it is invisible
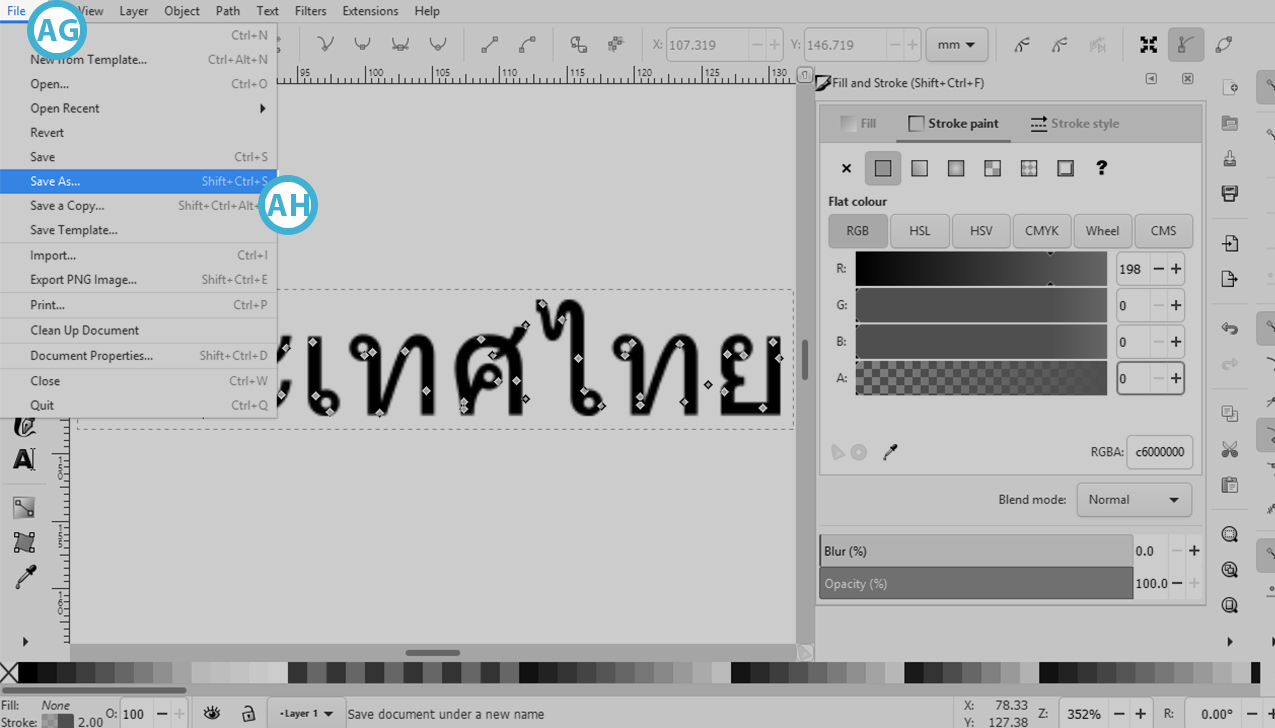
Step 12. Go to ‘File’ (AG), ‘Save as’ (AH)
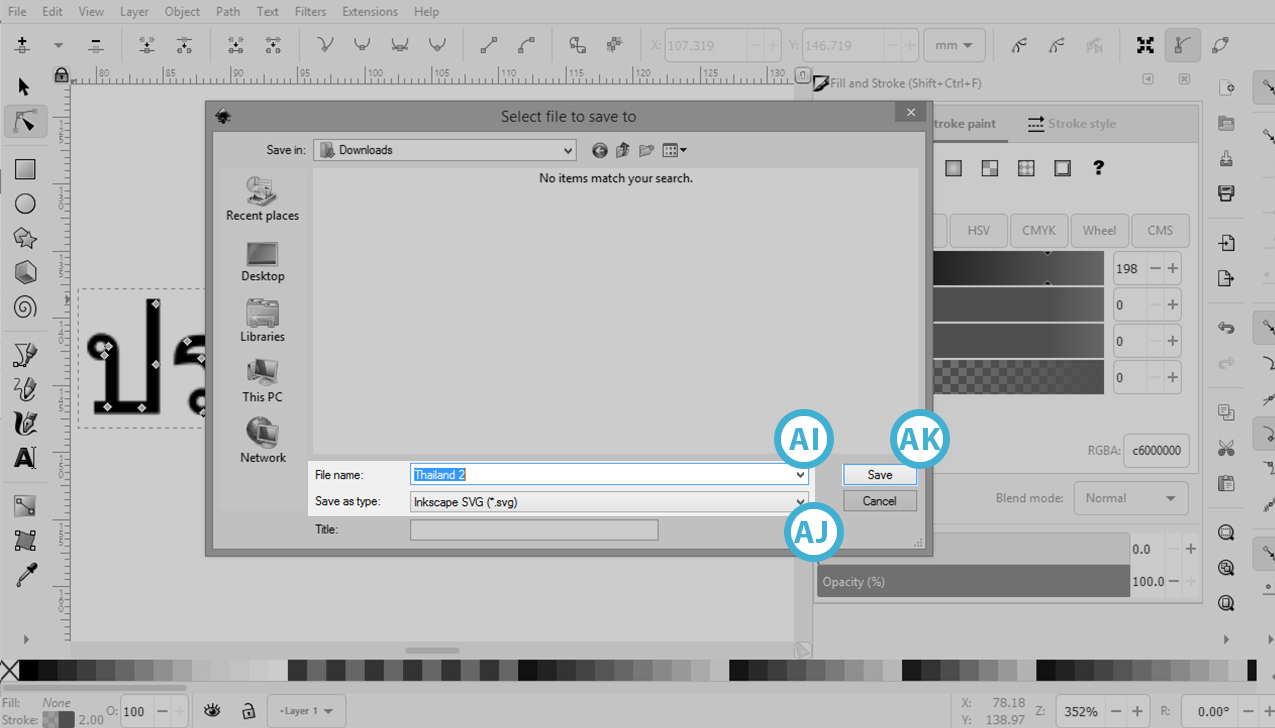
Step 13. Name the file (AI), ensure the file type is SVG (AJ) and Save (AK)
Step 14. Import this SVG as an image into VideoScribe
- If you are not sure how to do this please follow the steps on our Import images help page.